Pietenpol Air Camper Construction
How to Build a Pietenpol Air Camper or Sky Scout Airplane
Pietenpol airplanes built to the plans of my grandfather Bernard H. Pietenpol are straightforward, no-nonsense airplanes. They're great for puddle jumping or even long cross country trips. They fly low and slow, the same way they have for over eight decades.
Pietenpol Airplanes (Air Camper and Sky Scout) are low in cost, durable and most of all, FUN!! Probably the biggest reason they are inexpensive to build is that almost no aircraft-rated materials are required by the design. They are durable because the designer, B.H. Pietenpol, went out of his way to make every part of the ship stronger than necessary.
In short, we have found the Pietenpol Air Camper and Pietenpol Sky Scout to be real honest-to-goodness airplanes, built simply and inexpensively by honest-to-goodness people.
The Air Camper has some interesting design features. Because of the downward thrust of the propeller, (the engine is angled downward 5 degrees) the plane has a short/slow take off run, and landings are light on the wheels. The beauty of the Air Camper design is, that except for engine changes, more than 60 different engines have been adapted for use on the airplane. The basic plans behind the firewall do not need to change. This aircraft was the first to use the split axle landing gear and was the basis for the 1933 Improved Air Camper plan drawings by Orin Hoopman.
Bernard Pietenpol never lost sight of the cost of flying and showed his true genius in keeping the cost down - within reach of the "common man".
Let's discuss what makes up a Pietenpol Airship ("Air Camper or Sky Scout").
Your own set of "Original Pietenpol Air Camper plans":
To build a Pietenpol Air Camper or Sky Scout, first you need a set of plans available from Andrew Pietenpol (can be ordered on this website), and a work bench. For building tips, and construction detail, the builder's manual "Original Air Camper & Sky Scout Builders Manual" is recommended.
Fuselage:
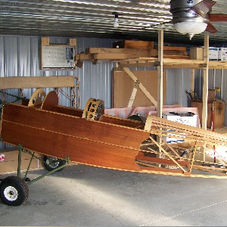
The longerons are made of 1 inch by 1 inch Sitka spruce. All struts and braces are milled from 1 inch by 3/4 inch Sitka spruce. All wooden pieces are glued together and held in place with rectangular wood gussets cut from 1/8 inch aircraft grade plywood, glued down with aircraft glue, and held in place by small aircraft brads while the glue is setting. The forward half of the fuselage is covered on both sides with 1/8 inch aircraft plywood. The plywood only extends from the firewall to back of the rear seat. Once the sides are assembled, they are up-righted on a workbench and joined together with struts and braces cut to provide tapering from the rear seat to the tail where the two sides will join. Quarter inch aircraft plywood is used for the floor of the cockpit, and firewall.
Turtle Deck:
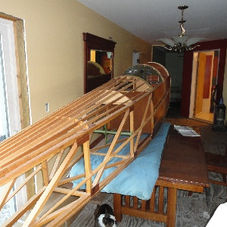
A turtle deck is created aft rear cockpit seat to facilitate crowning atop rear fuselage. This is accomplished by seven 1 inch x 1/4 inch Sitka spruce stringers set on edge to create what Mr. Pietenpol called a "Streamlined appearance".
Wing:
The wing is a one piece wing without any dihedral. The wing spans 28 feet 2 inches, giving it 140 square feet. Plans are also available for a three piece wing of the same length. Building a three piece wing is recommended when building space is of value. The three piece wing requires the additional building of a few extra wooden pieces, and metal fittings. The wing is built up with 28 ribs. The ribs are easily built in a homemade jig (no steaming required). Each rib is built out of 1/4 inch by 1/2 inch cap strip. This size cap strip is also used as rig struts which hold the top rib cap strip to the bottom cap strip. All ribs are held together by 1/16 in. aircraft plywood gussets 1 in by 3/4 in. The ribs are hung on two 28 foot long Sitka spruce spars of identical size (4 3/4 in. x 1 in x 28 foot). Each spar can be made of two 15 foot spars spliced together (very common). If you are building a three piece wing, each spar is then made up of three smaller length spars, with no splicing required (very common). Leading and trailing edges are made of Sitka spruce and are added.
Tail Feathers:
The tail group (rudder, vertical and horizontal stabilizers) is built just like the fuselage and wings with Sitka spruce spars, wide cap strips, and plywood gussets.
Covering:
The choice is yours! When Mr. Pietenpol built his airships in the 20's and 30's, Ceconite wasn't even invented. Grade A aero cotton was used. Today Ceconite works well. Newer technologies exist that work very good (Poly Fiber process). The wing, fuselage, and tail feathers are covered. Interior of fuselage is finished with three coats of spar aero/marine varnish, sanding between coats.
Engine:
Over time, Mr. Pietenpol built Air Camper's with Ford Model A engines, and lightweight aircraft engines; with appearances from Continental (A-65), Lycoming, Franklin, and yes the boxer style type Corvair auto engine (110hp) All very good! Many people are experimenting with other types of auto and aircraft engines.
Fuselage fittings:
The rudder is controlled by simple U-foot pedals attached to the cross members. The control cables are simply fastened to the control stick. All wing and tail feather fittings and the landing gear are built of 4130 aircraft steel.
Changes over the years:
Of course there were changes over the past 65+ years, but mainly to the powerplant. Over time, Mr. Pietenpol built Air Camper's with lightweight aircraft engines; with appearances from Continental (A-65), Lycoming, Franklin, and yes the flat six boxer type Corvair auto engine. When Mr. Pietenpol used light weight aircraft engines, or Corvair engines, he added 6 inches of length to the fuselage. These and all changes over time are reflected in the Air Camper plans. You can build it with any of these engines. They all work great! Plan on spending 900+ hours of wonderful fun and rewarding time building your Pietenpol Air Camper or Sky Scout!
Construction Airplane Photos
Sitka Spruce Wood: You do not need much. You also need (1) 4x8 1/4" - (1) 4x8 1/8",
(2) 4x8 1/16" Aircraft Plywood plus 2 square feet of 4130 sheet steel. (AP2)

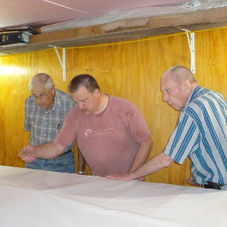
You will need a flat bench top: I turned my bench top into a waste high jig to save my back muscles - Start with fuselage first, ribs are so easy they can wait to the end. Remember everything attaches to the fuselage!

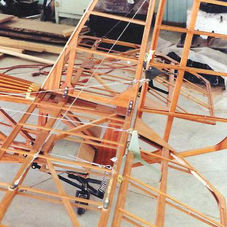
Start by putting up your two longerons: 1" x 1" (top and bottom), then insert your struts and braces. 1/8" glued down gusset plates hold everything together. Easy and very strong!

Attach 1/8" aircraft plywood sides: Look at these as very large gusset plates.

Connect the two fuselage sides: Connect with 1/2" x 1" braces and struts. All held together by 1/8" gussets. Just that simple!

Add a 1/4" Aircraft Ply floor: two seat backs, and two wooden seats.

Install Turtle Back aft of rear seat: Gives your ship an aerodynamic look.

Time to cut a little 4130 sheet steel: You do not need much time or steel. Good winter project! I found that purchasing an inexpensive metal band saw from Harbor Freight (167.00) worked wonderful for this. Cut out, grind and round corners on a bench top grinder. All metal pieces are primed with zinc chromate primer. A little welding is required. Tig/Mig or Oxy Acetylene all work good. Many people will pre-jig their parts and take them to a local welder who can in minutes weld up what you need. This is a photo Bernard shot.

Install all metal fittings: on your fuselage, wing, and tail feathers. I used AN type aircraft hardware (bolts).

Let's bring it all together! Mount your Engine, Put on your landing gear, add instruments. Then it's time to cover!

Additional Construction Photos


